Part 10 of 10
Hear that? It’s the fat lady singing – we’re finished! The video is complete and all that is left is to kick it out of Premiere and unleash it into the wild. When first attempting to export, you are faced with a daunting list of options that seem incomprehensible.
What even is a JPEG 2000 MXF OP1a anyway?
By breaking exporting down into a few concepts, you’ll be an export champ in no time.
Exporting Overview
This is by no means a comprehensive guide to all-things exports. It will however give you the footing to know how to post to the interwebs.
Open the export window by highlighting your sequence in the project panel or timeline window, then hit ctrl+E (Better Editor Keyboard) or click File > Export > Media. Here’s an essential breakdown of the window that opens:

- Output window – Shows what the resulting export should look like
- Export Settings – Basic settings for the export controlling the format (codec), name, and video/audio options
- Format – This is the codec the video will be exported at.
- Preset – Stock and custom save presets for easier exporting based on each format.
- Output Name – File name of the resulting export
- Export Video/Audio check boxes – Determines if video and audio will both be exported or just one or the other.
- Basic Video Settings – Controls options like the size and frame rate of the video. When using an Adobe preset, these can generally be left alone unless you have specific requirements.
- Queue – Adds video to the Media Encoder queue
- Export – Spits the video straight out of Premiere Pro
Export Format for Web
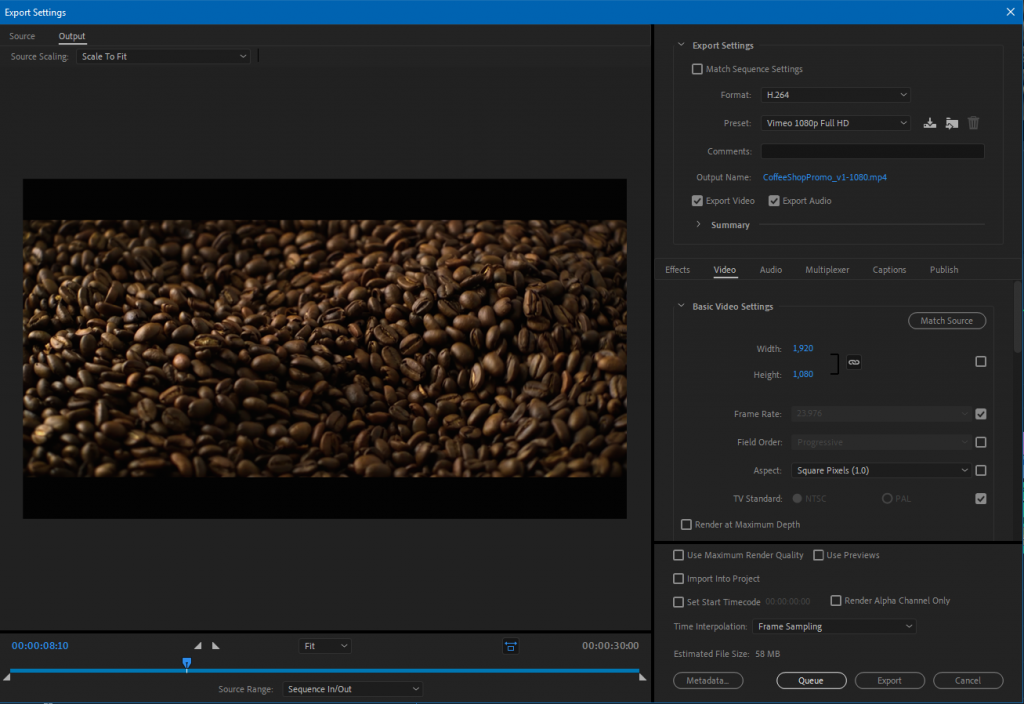
The internet’s favorite codec is an H.264. Selecting this under Format gives you a long list of presets to choose from. Based on resulting file size versus video quality, the Vimeo 1080p Full HD preset is my favorite. If you would like to understand more about codecs, check out this post.
Selecting those options and then naming your file is all you really need to do to get your video out in the open. Obviously as your editing journey continues, you’ll need to develop a better understanding of various formats and their uses.
Exporting Multiple Premiere Pro Sequences
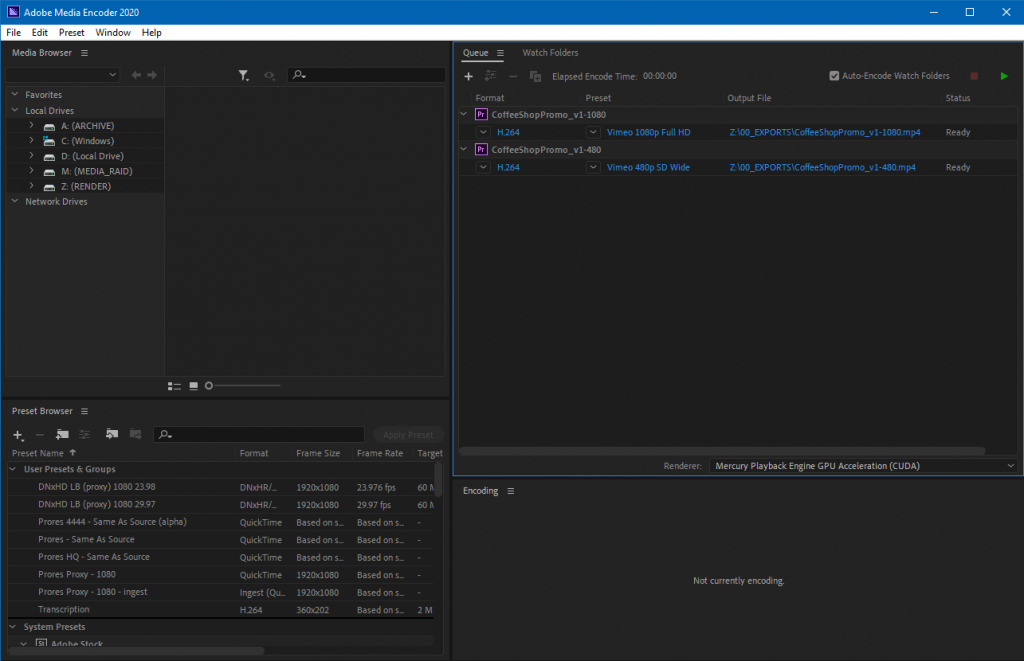
When there are multiple sequences in a project ready to export, it makes much more sense to send them to a Media Encoder queue. Media Encoder allows you to batch export sequences or batch transcode video clips, so you can “work” and drink a cocktail at the same time – Look, no hands!
Adding multiple sequences to an encoder queue works like adding a single sequence, but the window that appears is slightly different, losing the Output Window. Once the format and other settings are chosen, click “Queue”. Media Encoder will open automatically (takes a minute) and its queue will populate. Change filenames as needed and when all looks good, click the play button in the top right.

THANK YOU
That’s it for now. If you worked through this entire 10-part course, I hope you learned something and feel more confident inside of Adobe Premiere. Editing has been a career building passion for me and I hope that this has in some way assisted you on your own editing journey.
When you’re ready to take these skills to the next level, I hope you’ll consider my other courses that give aspiring editors the professional workflows and training that agencies, studios, and post-houses demand.
Lastly, if you enjoyed this course or even if you thought it was terrible, I’d love to hear from you.
Thank you!
-Chris
