Take me to the free downloads already!!!
Prep Images Before Editing
Before starting on your slideshow journey, I’d highly recommend prepping your images for use inside your NLE of choice. It doesn’t matter if you’re working in Adobe Premiere, Avid, Final Cut Pro, DaVinici Resolve, or something else, most images straight out of a digital camera will cause your computer’s processor to go bananas if you try to edit with them because their dimensions and DPI (dots per inch) are gigantic . I’m not saying it can’t be done, I’m just saying it’s a leading cause in headaches in editors.
The better way is to do a little bit of upfront work on your images to avoid popping painkillers. I generally try to keep any still images I use in an edit to these specs:

I’ll admit the frame size is conservative, but if I’m not delivering a 4k/6K/8K slideshow and don’t plan on punching into an image, then there’s no need for the jumbo size. Your computer will thank you for using less pixels anyway.
Before prepping the slideshow’s images, be sure to set a Photoshop Action that resamples the image to 72 dpi. If you don’t want to create your own, feel free to download the 72 dpi action I created at the bottom of this post and follow along here to learn how to install it.
Photoshop Saves the Day
Adobe Photoshop has a nifty feature hidden in its File menu under File > Scripts > Image Processor. The image processor automates basic tasks of converting image types, changing image dimensions, and applying custom actions. We’re going to use it to batch convert all of our slideshow images into the proper spec using the settings below. Make sure to create or install the 72 dpi action prior to opening the Image Processor.
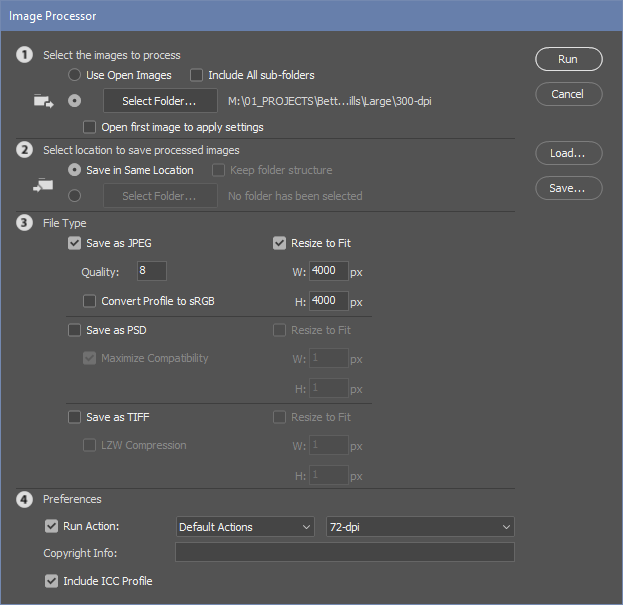
Using these settings, Photoshop will create a new folder, “JPEG”, in the source images folder that holds the converted images.
Tweak Premiere’s Image Preferences
Now warming up for the slideshow edit, we first need to look at Premiere Pro’s Timeline Preferences.

Under Edit > Preferences > Timeline, set the “Still Image Default Duration” to a length you like. This setting tells Adobe Premiere what length it should make all images imported into the program. My preference is 3 seconds. You can still trim or extend the individual photos in your sequences as needed.
Add Images & Music
Next up may be the easiest step – just drag and drop your photos into a new sequence. If you have a specific order you’d like the slideshow’s images to be in, now’s the time to shuffle them around.
…Just keep shuffling
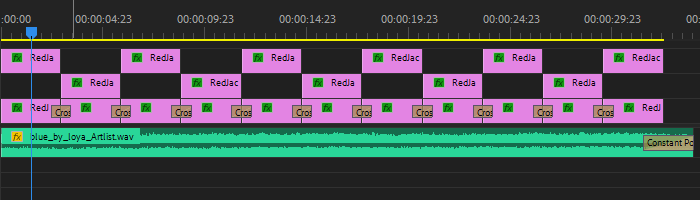
Lay in your music to this base layer of images and then adjust the timing of the edits between images to the music cue. Cut your edits so that they land on steady beats in the music, letting the music drive the slideshow’s changing images.
Enhance with Effects
Here’s the fun part. The bones of the slideshow have been edited, a music track and photos. Now we get to make it pop with a mixture of free presets and effects.
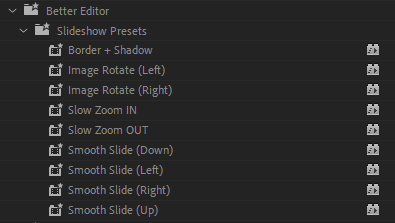
In the tutorial video I only use the “Smooth Slide (Down)” preset, but try mixing and matching to achieve the look you like. Add in other effects like gaussian blurs or color effects from the Lumetri panel. One of the easiest effects to add is simply reducing the “vibrance” of an image using Lumetri.
When in Doubt, Template Out
Let’s get theoretical for a second. Assume – theoretically – that you’re pinched for time and need a slideshow to absolutely wow a client – or your grandmother (theoretically of course). There is no shame in purchasing a prebuilt slideshow template online from places like Videohive.net or MotionArray.com and then modifying it to your liking. Learning Premiere Pro’s basics will make modifying those templates a bit easier too.
At the end of the day we as editors must strike the balance between creativity, time management, and client expectations. Just never forget to add your own unique creative touch.