Adding a Submix
Submixes take advantage of Premiere Pro’s audio track mixer. If you haven’t thrown that gem of a tool into your workflow yet, maybe read this first.
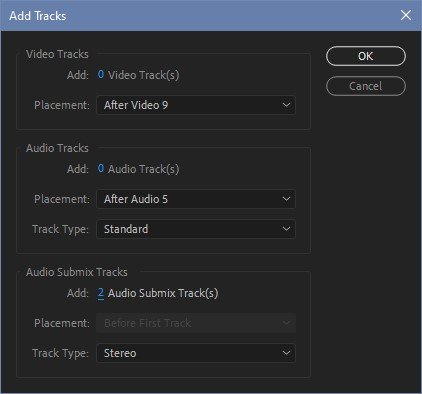
You can add submixes to a sequence in the sequence settings when starting a new sequence or what I normally do is right click in the sequence under the track targets, selecting “Add Tracks”.
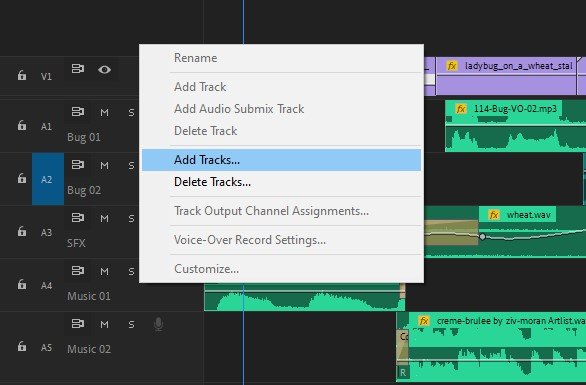
A window pops up that allows you to add multiple video or audio tracks to your sequence at once. In this case, I’m adding 2 submix audio tracks. For my more complex edits, I usually end up with 3 submix tracks – dialogue, sound effects, music – which works out well if I need to make audio splits or stems.
Assign Tracks
Like with most things in editing, it’s helpful to be organized, so rather than keeping the generic “Submix 1” name assigned by Premiere, I change them to “DX” and “MX” for dialogue and music. With the submixes named, I can twirl down the track assignments for each track and select which submix I want them to port through.
Using Submixes
Once the submixes have been created and assigned, they can be treated like any other audio track within Adobe Premiere. Using the audio track mixer you can add effects, adjust levels, and change the pan of each submix. When you do, all of the tracks that are assigned to that particular submix will be affected by the submix.
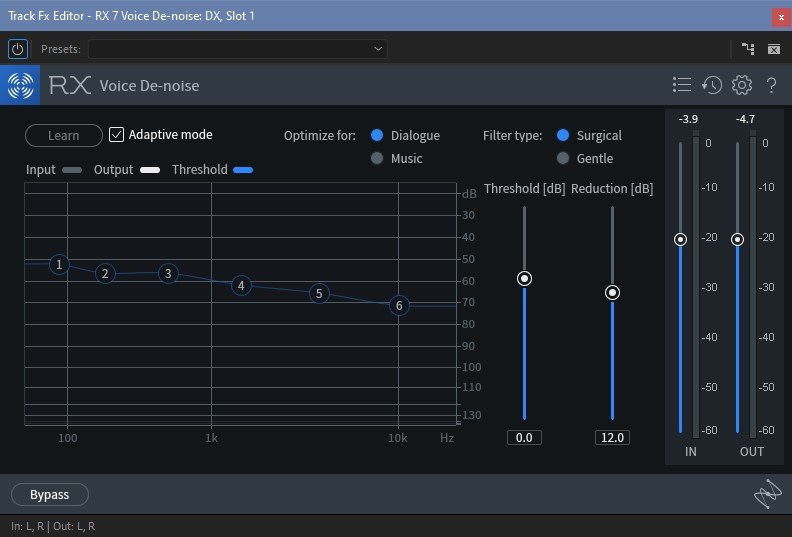
A perfect example on how to use this is reducing noise in dialogue tracks. It’s not uncommon to receive audio with some background noise and in some cases, Premiere’s DeNoise effect can clean that up. In practice, I’ve found that third party plugins do a much better job, like iZotope’s RX Elements Pack. Included in the pack is iZotope’s easy-to-use “De-noise” effect. Simply add the effect to whichever submix needs it and you’re done. De-noise immediately goes into an automatic or adaptive setting, analyzing and cleaning the audio as it’s played. In another word, it’s magic.
So rather than applying that effect to every individual noisy clip or to each dialogue track, it can be added once to a submix for all of the dialogue tracks, saving computer resources and keeping Premiere Pro from thinking too much.
Bonus: Scooping Audio
The word scoop normally sends my mind racing towards ice cream, but we’re talking audio. Scooping audio refers to using an equalizer, like Premiere’s Parametric EQ, to carve out small frequencies of music to make more room for the human voice’s frequencies. Doing so makes it easier to hear dialogue over music while still hearing the music’s fidelity. It’s also good practice to duck music tracks when there’s dialogue, but that’s another topic.
This principal and Parametric EQ effect can be applied across the MX or music submix, carving out room for the ladybug’s dialogue. I did create a scooped EQ preset to share, but at this time it can only be applied at the clip level….for whatever reason, Adobe won’t let you add presets to track-based effects in the audio track mixer. You should comment and let them know how dumb that is. Anyway, if you would like the clip-based preset, please check out the downloads below!