Part 9 of 10
The video is complete, but we are not done. The last step before delivering your hard work is to give it some polish or finishing. In professional workflows this is often completed by an online or finishing team that will sweeten the audio and color correct the video. It’s increasingly easier to do much of this process as an individual though with tools that are already familiar.
Mixing Audio
I will be the first to tell you that mixing is not my strength and I’m envious of audio pros. Aside from the sound effects our coffee promo is fairly basic on the audio side of things though. No need for ducking audio due to dialogue or adding EQ effects to make dialogue pop.

What I’m concerned with in this edit are levels: the level of the overall sound and levels of the individual sound effects. As we sound designed, we inherently set levels of the effects as we went. It’s a good idea to reevaluate the effects’ loudness at this stage to make certain nothing sounds too strong or weak. Do a similarly with the music. Some parts of the music cue may need to be pulled back or pushed forward depending on the effect you want on the viewer.

Overall levels determine the loudness of the video as a whole. Twelve sound effects stacked on each other, covering a loud portion of music will most certainly cause the audio meters to peak. When audio peaks and the tops of the meters turn red, this can result in clipping audio that sounds distorted (and wayyyy too loud) to the listener. As a very general rule of thumb for internet deliveries, I try to make audio levels peak around -6 dB. That gives some room for cushion and won’t blow some dude with earbuds out of his subway seat.
Coloring
Color correction and color grading are part science and art. Color is a surprisingly complex subject, but we can achieve some great results without getting too textbook thanks to simple sliders, color pickers, and a bit of Adobe Sensei magic.
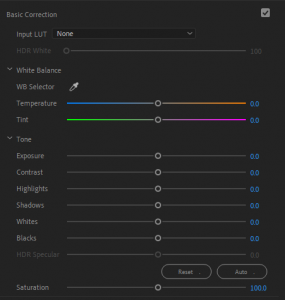
Lumetri Color – Basic Correction

Correcting the color in a clip is as simple as grabbing a proper white balance using Lumetri’s WB Selector. Click the WB Selector tool (color picker) and in the program monitor click on a part of the image that is what should be white. Changes are instant. You can continue to tweak using the sliders in the Lumetri panel, making sure exposure, highlights, shadows, and saturation look how you like.
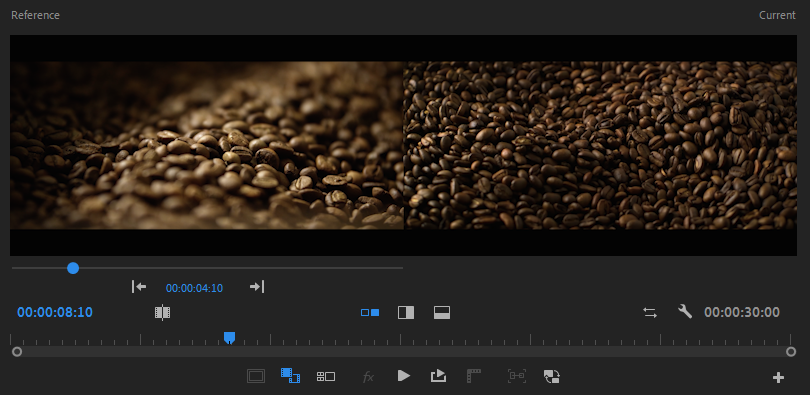
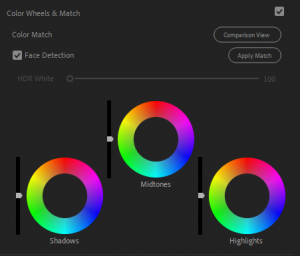
Lumetri Color – Shot Matching


Part of Adobe Sensei technology, Lumetri’s color matching feature is found under the Color Wheels & Match tab. While not always perfect, it can do a good job or at least get you headed in the right color direction. To use, turn on comparison view, point the reference monitor (now left-hand side of program monitor) to a timeline clip you like the color of, and back in the Lumetri panel, click Apply Match. Within a few seconds Lumetri’s color wheels and levels adjust to give you a color-matched shot.
Final Looks
Once finished coloring, take one last pass across your video and compare shots that surround each other. Look for anything that stands out like one shot being cooler (blueish) vs the shot(s) next to it being warmer (orangeish), or one shot being drastically brighter than the shot(s) next to it. Adjust as necessary so that the entire piece has a consistent look throughout.
Then you are done! At this point I like to render the entire piece (Sequence > Render In to Out) and watch it play back. When you do this, be sure to relish in your awesomeness.

