Part 2 of 10
With general project setup behind us, we could jump straight into an edit. I’m going to pump the breaks a touch, pop the hood, and make a few adjustments to Premiere that will make our editing lives a lot more fluid and efficient. Let’s take a look.
Changing Preferences
Adobe Premiere has a ton of options under the hood for making the program operate the way you want it to work. The flexibility that provides is immense and a bit daunting at times. Rather than deep diving into the preferences, I’m going to show you the 3 most important preferences I change for a better editing experience:
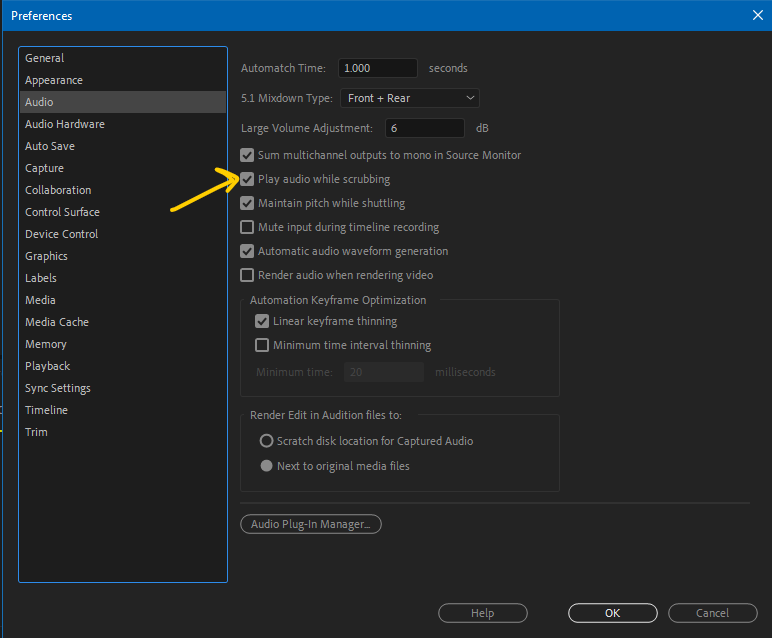
Audio > Play Audio While Scrubbing –
Check this box so that as you scrub (dragging the play head across media) the timeline or source monitor and you’ll hear audio playback. This is very helpful when testing how edits between clips work, finding beats in music, and digging through dialogue.
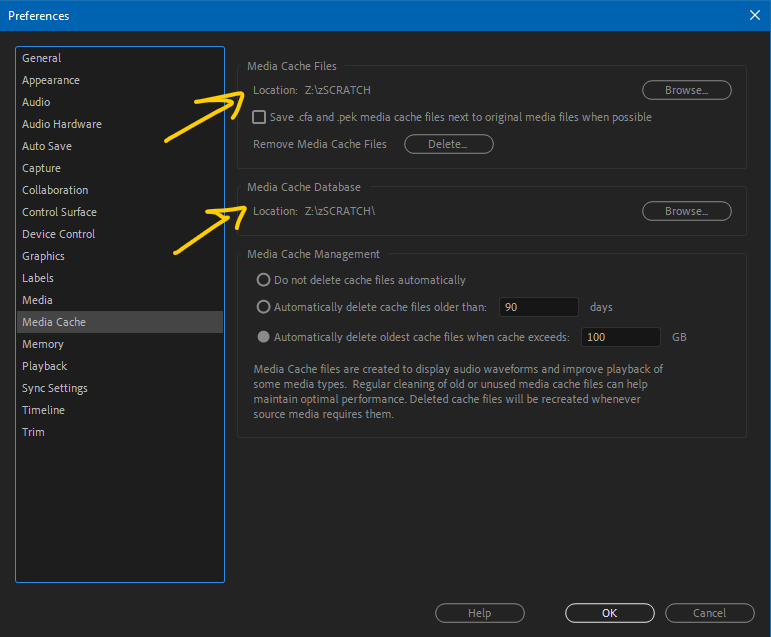
Media Cache –
This is simply a housekeeping preference. The media cache houses temporary files that Premiere uses to access larger media files faster. It also includes a database that it uses to navigate between cache file and source file locations. I realize that sounds like a bunch of jargon.
Similar to scratch disks, I point my media cache and database to a separate fast drive. I also point it to the same scratch folder as my scratch disks so I can easily find these files in case of any troubleshooting.
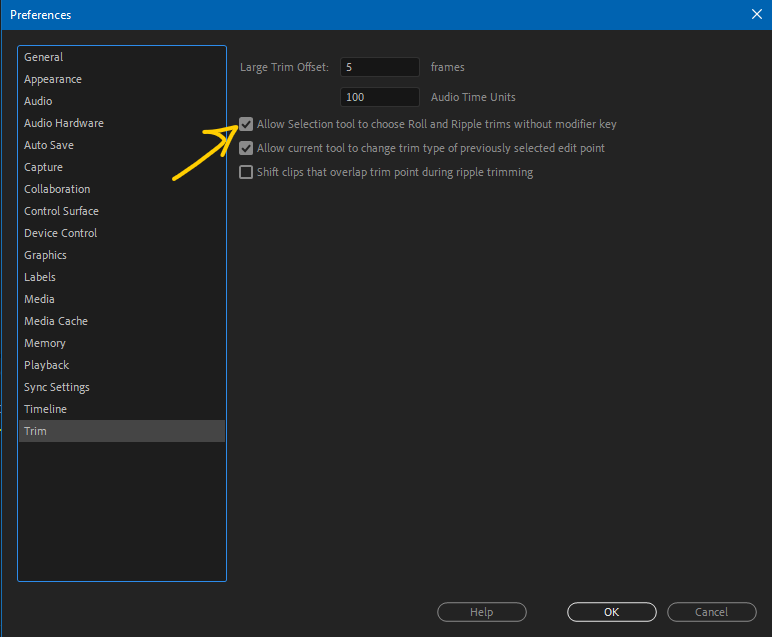
Trim > Allow Selection Tool to Choose Roll and Ripple Trims Without Modifier Key – That’s a mouthful…and in my opinion the most important preference to change. This will allow our mouse to act as three separate tools at once when editing clips on the timeline. When checked, this enables the mouse to ripple trim left or right and roll an edit left or right simple by moving the mouse’s location around an edit point. More on that in part 3.
Keyboards vs Mice
Keyboards are faster than mice. Remember that and you’ll already be a faster editor than most. Don’t get me wrong – the mouse has its place, but using Premiere’s standard keyboard shortcuts or creating your own is the first step in becoming a more efficient editor.
Like I previously mentioned, my editing path has covered many NLEs (non-linear editors). Over that time, I’ve created, tweaked, and revised a set of keyboard preferences that, at least for me, can translate easily between programs. After some brief setup I can operate basically any NLE in a similar fashion thanks to these keys that I’ve learned. That gives me the flexibility to not be leashed to only a single program.
Hotkey basics:
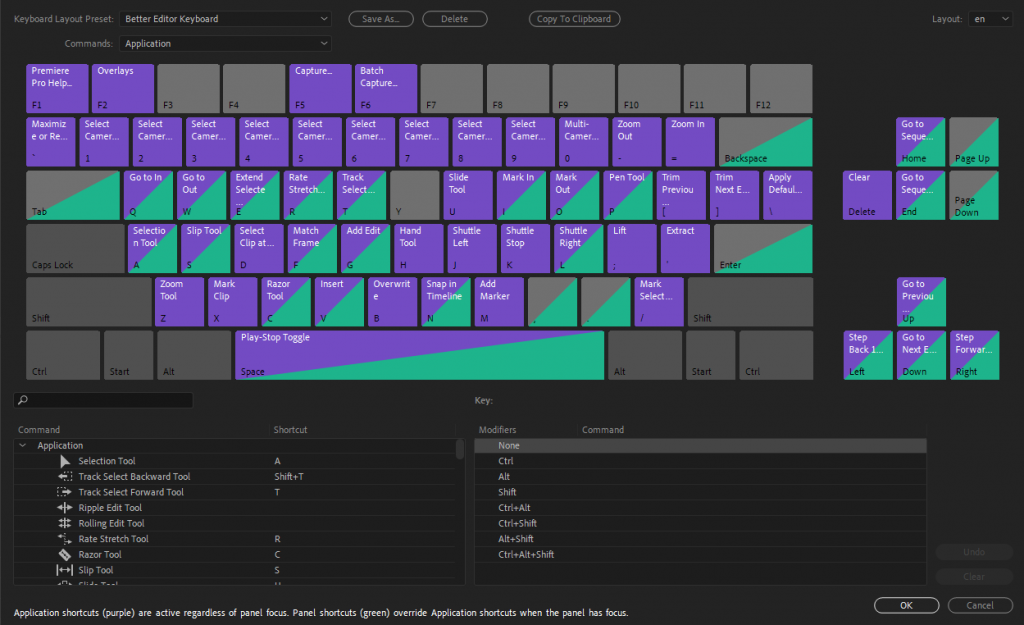
- Insert (V) – Insert edit adds clips to the timeline at the play head location and shifts media following the insert forward
- Overwrite (B) – Overwrite edit adds clips to the timeline by covering blank space or other clips already in the timeline. It does not shift or push clips down the timeline.
- Add Edit (G) – My favorite key, hands down. Think of the add edit like the razor blade mouse tool, but so much faster. It adds an edit or a cut wherever the play head is marked. It can affect selected clips or just those on targeted tracks in the timeline.
- Nudge (< and >) – Nudge is also a favorite shortcut. With a clip or clips selected, pressing the nudge key will move clips forwards or backwards down the timeline one frame at a time. Really these keys are the (,) for nudge left and (.) for nudge right. The arrows above the comma and period are what help me remember the nudge direction. I also like to map (shift+,) and (shift+.) for nudging 5 frames left and right, respectively.
- Selection Tool (A) – Slightly more uncommon is making the (A) key my selection tool. I did this because (V) was taken by insert and (A) allows me to keep my hand basically in one place on the keyboard and still easily hit multiple commands.
I’d encourage you to set these keys yourself in Edit > Keyboard Shortcuts, but if you’re looking to save time, my personal Premiere Pro keyboard layout is a download at the bottom of this post. I’ve also included a PDF that diagrams all of my programmed hotkeys.
Up Next: Part 3 – 10 Essential Edits

